Off-Grid Shed with Underground Storage: Maximize Space and Security

Tuesday, February 4, 2025

Off-Grid Shed with Underground Storage: Maximize Space and Security

Dreams of self-sufficiency often collide with the realities of limited space and security concerns. But what if you could combine the practicality of an off-grid shed with the unparalleled security and extra storage capacity of an underground vault? This article explores how to design and build such a structure, maximizing both space and security for your off-grid needs. Imagine a sanctuary – a hidden, secure haven for your precious belongings and essential supplies, seamlessly integrated with your workspace and living quarters.

Planning Your Underground Storage Shed

Before breaking ground, meticulous planning is paramount. Consider the local building codes and regulations, soil conditions (assessing drainage and potential flooding risks), and the overall size of your project. Think carefully about the types of materials you'll utilize; durability and resistance to moisture are key. Concrete is a popular choice for its strength and longevity, but you might also explore other options, like insulated concrete forms (ICFs) for energy efficiency. Sketch out detailed plans, including dimensions for the above-ground shed and the underground vault. Remember to factor in access points – a convenient, yet secure, entrance to the underground space is critical. A sturdy, reinforced hatch concealed within the shed floor is a popular and effective solution. Don't forget to factor in ventilation to prevent the build-up of moisture and gases within the underground storage.

Site Selection and Soil Analysis

Choose a location that's both accessible and well-protected from the elements. Perform a thorough soil analysis to determine the best foundation type and to avoid potential problems like unstable ground or high water tables. Consider proximity to existing utilities like water and power (if any will be used). A site survey will highlight any potential obstacles, ensuring a smooth construction process. Professional assistance may be worthwhile to fully understand your site's characteristics and to avoid costly mistakes later.

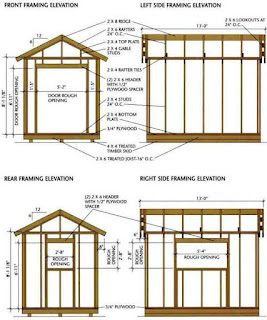
Above-Ground Shed Design Considerations

The above-ground shed should serve a dual purpose: it should provide convenient workspace and shelter for your off-grid equipment, and it must seamlessly integrate with the hidden underground storage. Think about incorporating features like solar panels for renewable energy, rainwater harvesting systems, and ample ventilation to prevent moisture damage. Consider the placement of windows for natural light, but prioritize security features such as robust locks and reinforced construction. A well-integrated design will not only enhance functionality but will also enhance the overall aesthetic appeal of your property.

Constructing Your Secure Underground Storage

Building the underground vault requires specialized expertise and attention to detail. Excavation is the initial step, ensuring precise dimensions and proper drainage. Formwork is then constructed to hold the concrete, and reinforcement bars are strategically placed to provide structural strength. The use of high-quality waterproof concrete is crucial to prevent water ingress and maintain a dry environment. After the concrete cures, the hatch access point should be carefully installed and sealed. Consider adding a layer of insulation within the vault walls to regulate the temperature and to prevent condensation.

Security Measures for the Underground Vault

Security should be a primary focus. Beyond the sturdy concrete construction, consider incorporating additional security features:

  • Reinforced steel doors and locking mechanisms.
  • Alarm systems linked to a remote monitoring service.
  • Surveillance cameras, both inside and outside the structure.
  • Motion detectors to deter intruders.
Investing in robust security measures will provide peace of mind knowing your valuable assets are well-protected.

Integrating Off-Grid Systems

To achieve true off-grid functionality, seamlessly integrate renewable energy sources, such as solar panels and a wind turbine, to power your shed and underground vault. Consider a battery storage system to ensure a reliable power supply, even during periods of low sunlight or wind. Implement a rainwater harvesting system to collect and store water for various purposes, reducing reliance on external resources. A composting toilet might be a consideration for a truly independent system.

Building an off-grid shed with underground storage is a challenging yet rewarding undertaking. With careful planning, attention to detail, and a focus on security, you can create a durable, secure, and efficient space that perfectly complements your off-grid lifestyle. Remember to prioritize safety throughout the entire construction process, and don't hesitate to seek professional assistance where needed.

Read More..

How to Install Gutters on a Gable Roof Shed for Better Drainage

Installing Gutters on a Gable Roof Shed for Enhanced Drainage

Proper drainage is crucial for the longevity and structural integrity of any building, including a shed. A gable roof shed, while aesthetically pleasing, is particularly susceptible to water damage if not equipped with adequately installed gutters. This comprehensive guide details the process of installing gutters on a gable roof shed, ensuring optimal water diversion and protecting your investment.

Pre-Installation Planning and Material Selection

Before commencing the installation, meticulous planning is paramount. This phase involves several key steps to ensure a smooth and efficient process.

Measuring and Calculating Gutter Length

Accurate measurement is the cornerstone of successful gutter installation. Begin by measuring the length of each side of your shed's roofline where you intend to install gutters. Add an extra 6-12 inches to each measurement to account for overlaps at the corners and end caps. These additions are essential for proper joining and watertight seals. Failing to account for this can result in leaks and ineffective drainage.

Choosing the Right Gutter System

The selection of the gutter system depends on several factors, including the size of your shed, the volume of rainfall in your region, and personal aesthetic preferences. Aluminum gutters are a popular choice due to their lightweight yet durable nature, resistance to corrosion, and affordability. Vinyl gutters offer a lower-cost option, but they are less durable and susceptible to damage. Consider the weight capacity of your gutters; this is particularly critical for larger sheds that experience significant rainfall. Overburdened gutters can sag or detach, negating their intended purpose.

Gathering Necessary Tools and Materials

Prior to starting the installation, assemble all necessary tools and materials. This will streamline the process and prevent interruptions. The list includes:

  • Measuring tape
  • Level
  • Drill with appropriate drill bits
  • Screws designed for exterior use (typically stainless steel)
  • Gutter sealant
  • Safety glasses
  • Work gloves
  • Ladder (sufficient height and stability)
  • Gutters (pre-cut to measured lengths or in sections for joining)
  • Downspouts
  • End caps
  • Elbows (for directing water away from the shed)
  • Connectors (for joining gutter sections)
  • Hanging brackets (spaced evenly along the fascia board)

Ensure all materials are compatible with each other and suitable for outdoor exposure. Using inferior materials can compromise the longevity and effectiveness of your gutter system.

Installing the Gutter System: A Step-by-Step Guide

The actual installation process requires precision and attention to detail. Improper installation can lead to leaks and inefficient drainage.

Installing the Gutter Brackets

Begin by installing the hanging brackets along the fascia board. These brackets provide the support structure for the gutters. Maintain a consistent spacing between the brackets, typically around 24-36 inches apart, depending on the gutter's length and the manufacturer's recommendations. Use a level to ensure each bracket is perfectly horizontal; this is crucial for proper gutter alignment and water flow. Pre-drilling pilot holes will prevent splitting the fascia board. Secure each bracket firmly using weather-resistant screws.

Attaching the Gutters to the Brackets

Once the brackets are securely in place, carefully slide the gutter sections onto the brackets. Ensure a snug and even fit. Use gutter connectors to join multiple sections, ensuring a watertight seal. Apply gutter sealant to the joints for added protection against leaks. Properly aligned and secured gutters should sit evenly and firmly on the brackets without sagging.

Installing End Caps and Downspouts

After installing the main gutter sections, attach the end caps to the ends of the gutters. Secure these with appropriate screws and sealant to prevent water from seeping in. Install downspouts at appropriate locations, usually positioned at the lowest point of the gutter runs. Use elbows to direct water away from the shed's foundation, preventing potential water damage.

Securing Downspout Extensions

Downspout extensions are necessary to direct water away from the shed's foundation. These extensions can be either rigid or flexible, depending on the terrain and desired aesthetic. Ensure the downspout extensions are securely fastened and extend far enough to prevent water from pooling near the foundation or eroding the soil around the shed.

Post-Installation Inspection and Maintenance

After completing the installation, conduct a thorough inspection to verify proper functionality and identify any potential issues. Check for leaks around seams and connections. Inspect the downspouts for proper water flow and drainage. Ensure that the gutters are securely fastened and do not sag or show any signs of damage.

Regular Maintenance for Optimal Performance

Regular maintenance is critical to preserving the efficiency and lifespan of your gutter system. At least twice a year, clear debris such as leaves and twigs from the gutters and downspouts. This prevents clogging, which can lead to water overflow and potential damage. Inspect for any signs of damage, such as cracks, loose connections, or corrosion. Repair or replace any damaged components promptly to prevent further problems.

Troubleshooting Common Issues

Despite careful installation, some issues may arise. Understanding these common problems and their solutions is crucial:

Sagging Gutters

Sagging gutters are typically due to insufficient bracket support or overloading. Add more brackets at regular intervals to evenly distribute the weight. Overloading may require a larger capacity gutter system.

Leaks

Leaks often result from improper sealing of joints or damaged sections. Apply additional sealant to any suspect areas. Replace damaged sections as necessary.

Clogging

Regular cleaning is paramount to prevent clogs. Use a gutter cleaning tool or manually remove debris. Consider gutter guards to minimize debris accumulation.

By following these guidelines, you can effectively install gutters on your gable roof shed, ensuring robust drainage and safeguarding your investment for years to come. Remember to always prioritize safety and use appropriate protective gear throughout the installation process. Careful planning, meticulous execution, and consistent maintenance will guarantee the long-term efficiency and effectiveness of your gutter system.

Read More..

Free Shed Plans: Download and Start Building Today

Free Shed Plans: Download and Start Building Today

The construction of a shed offers a rewarding blend of practicality and personal accomplishment. Whether intended for storage, workshop use, or a tranquil retreat, a well-designed shed enhances property value and provides invaluable extra space. This comprehensive guide explores the accessibility of free shed plans, detailing the considerations involved in choosing a suitable design, acquiring necessary materials, and undertaking the construction process itself. We aim to empower individuals to confidently embark on this fulfilling project, maximizing their resources and achieving a finished product that meets their specific needs and aesthetic preferences.

Choosing the Right Shed Plan

Selecting the appropriate shed plan is the cornerstone of a successful project. A multitude of factors influence this critical decision, demanding careful deliberation. Before downloading any plans, thorough consideration should be given to the following aspects:

Size and Dimensions

The dimensions of your shed are intrinsically linked to its intended use. A small shed (under 100 square feet) might suffice for basic tool storage, while a larger structure (200 square feet or more) could accommodate a workshop or gardening equipment. Accurately assess your storage needs to avoid building a shed that is either too small or unnecessarily large.

Style and Aesthetics

Sheds are no longer merely utilitarian structures; they can be aesthetically pleasing additions to any property. A variety of architectural styles exist, ranging from traditional gambrel roofs to modern designs incorporating sleek lines and large windows. Consider the overall style of your house and surrounding landscape to ensure the shed complements, rather than clashes with, the existing aesthetic.

Materials and Construction

The choice of materials significantly impacts the shed's durability, cost, and maintenance requirements. Common materials include pressure-treated lumber, metal, and vinyl. Each presents unique advantages and disadvantages concerning cost, longevity, and aesthetic appeal. Carefully review the plans' specifications regarding materials to ensure compatibility with your budget and skillset.

Building Codes and Permits

Before beginning construction, familiarize yourself with local building codes and permit requirements. Depending on the size and complexity of your shed, obtaining a permit might be mandatory. Ignoring local regulations can lead to significant fines and potential demolition orders. Contact your local building department to determine the necessary steps and obtain any required permits before proceeding.

Locating and Utilizing Free Shed Plans

Numerous online resources provide free shed plans, offering a wide array of designs to suit different needs and skill levels. However, it's essential to approach the selection process critically, ensuring the chosen plans meet the necessary criteria for safety, structural integrity, and suitability for your chosen materials.

Reliable Sources of Free Plans

While many websites offer free shed plans, the quality and accuracy of these plans can vary significantly. Prioritize reputable websites known for their detailed and well-reviewed plans. Look for sites with user feedback and reviews to gauge the plan's feasibility and potential challenges. Government websites and established woodworking communities often provide reliable resources.

Reviewing and Understanding the Plans

Once you've selected a plan, thoroughly review all aspects before commencing construction. Ensure you understand the materials list, cutting diagrams, and assembly instructions. Identify any ambiguities or potential challenges early on to prevent delays and frustration during the building process. If you're uncertain about any aspect of the plans, seek clarification from experienced builders or online forums.

Modifying Plans to Suit Your Needs

While free shed plans offer a valuable starting point, you might need to modify them to fit your specific circumstances. This might involve adjusting the dimensions, altering the design, or substituting materials. However, any modifications should be carefully considered to ensure the structural integrity of the shed remains unaffected. If you're making significant alterations, consulting with a structural engineer is advisable.

Gathering Materials and Tools

Once you've finalized your chosen plan, compiling the necessary materials and tools is the next critical step. A well-organized approach minimizes delays and ensures a smoother construction process.

Creating a Detailed Materials List

Carefully review the plans' materials list, adding any additional items you might need. Consider purchasing extra materials to account for potential errors or unforeseen circumstances. This is especially crucial for lumber, as variations in length and quality can occur.

Acquiring Necessary Tools

The tools required will depend on the complexity of the shed design. However, some basic tools are essential for almost every shed project. These typically include:

  • Measuring tape
  • Level
  • Saw (circular saw or hand saw)
  • Drill
  • Screwdriver(s)
  • Hammer
  • Shovel
  • Safety glasses and gloves

Remember to prioritize safety by using appropriate safety gear throughout the construction process.

Organizing and Storing Materials

Organize your materials in a logical manner to facilitate easy access during construction. Protect lumber from the elements to prevent warping or damage. Establish a designated area for storing materials and tools to minimize clutter and improve efficiency.

Building Your Shed: A Step-by-Step Guide

The actual construction process will vary depending on the chosen plan, but a general approach involves the following steps:

Site Preparation

Begin by preparing the building site. This involves clearing the area of debris, leveling the ground, and marking the foundation outlines. Accurate measurements are vital to ensure the shed is properly positioned and aligned.

Foundation Construction

Construct a suitable foundation based on the plan's specifications. This could involve a concrete slab, a gravel base, or pressure-treated skids. The foundation's stability is critical for the overall longevity and structural integrity of the shed.

Framing and Wall Assembly

Carefully follow the plans' instructions for framing the walls and assembling the roof structure. Accurate cuts and precise measurements are essential for a structurally sound shed. Ensure proper bracing and fastening techniques are employed.

Sheathing and Roofing

Apply sheathing to the walls and roof, providing a weatherproof barrier and structural support. Install the chosen roofing material, ensuring proper overlap and sealing to prevent leaks.

Finishing Touches

Complete the shed's construction by adding doors, windows, and any other desired features. Consider painting or staining the shed to enhance its aesthetic appeal and provide additional protection from the elements.

Remember to prioritize safety throughout the construction process and seek assistance if you encounter any difficulties. Building a shed is a rewarding experience that provides lasting value. With careful planning, diligent execution, and a commitment to safety, you can successfully construct a durable and aesthetically pleasing shed that meets your needs for years to come.

Read More..

8x8 Lean-To Shed DIY Painting Tips: Long-Lasting and Weatherproof Finish

8x8 Lean-To Shed DIY Painting Tips: Achieving a Long-Lasting and Weatherproof Finish

Constructing an 8x8 lean-to shed is a rewarding DIY project, providing valuable extra storage space. However, the longevity and aesthetic appeal of your new structure depend significantly on the quality of the paint job. This comprehensive guide provides detailed instructions and crucial considerations for achieving a durable and weatherproof finish on your 8x8 lean-to shed, ensuring years of protection and visual appeal.

Preparation: The Foundation for a Superior Finish

The adage "preparation is key" rings particularly true in exterior painting projects. A meticulously prepared surface dramatically improves paint adhesion and longevity, minimizing the risk of peeling, chipping, and premature degradation.

Cleaning the Shed Exterior

Begin by thoroughly cleaning the shed's exterior. Remove all loose debris, such as cobwebs, dirt, leaves, and any clinging mud or soil. A stiff-bristled brush, a pressure washer (used cautiously to avoid damage), or a combination of both will prove effective. Pay particular attention to corners, crevices, and areas prone to dirt accumulation. For stubborn stains, consider using a suitable cleaning solution following the manufacturer's instructions, ensuring complete rinsing afterward. Allow the shed to dry completely before proceeding to the next stage.

Repairing Damaged Areas

Carefully inspect the shed's exterior for any damage, including cracks, holes, splits, or rotting wood. Address these issues promptly using appropriate repair materials. For minor cracks, wood filler is generally sufficient. Larger holes or damaged sections may require more extensive repairs, potentially involving wood replacement and securing with appropriate fasteners. Ensure all repairs are thoroughly sanded smooth to achieve a seamless surface before painting.

Priming for Optimal Adhesion

Priming is a critical step often overlooked. A quality primer acts as a bonding agent, improving paint adhesion and preventing the underlying wood from absorbing the paint, thus reducing the overall amount of paint needed and enhancing the final finish. Choose a primer specifically designed for exterior use and suitable for the type of wood used in your shed's construction. Apply the primer evenly in accordance with the manufacturer's recommendations, ensuring complete coverage. Allow ample drying time before applying the topcoat.

Choosing the Right Paint for the Job

The selection of paint plays a crucial role in determining the longevity and weather resistance of your shed's finish. Opting for inferior paint will ultimately lead to premature deterioration and necessitate costly repainting in the near future.

Exterior-Grade Paints: A Necessary Choice

Never compromise on the quality of paint. Utilize only exterior-grade paints specifically formulated to withstand the elements. These paints contain UV inhibitors and weather-resistant additives that protect against sun damage, moisture absorption, and fungal growth. Look for paints that are labeled as being resistant to mildew and fading.

Acrylic vs. Oil-Based Paints

Both acrylic and oil-based paints offer advantages and disadvantages. Acrylic paints are generally preferred for their ease of application, quick drying time, low odor, and water-clean-up. They are also less likely to crack or peel. Oil-based paints offer superior durability and water resistance but require solvents for clean-up and have a stronger odor and longer drying time.

Color Selection and Considerations

The color you choose can impact the shed's temperature. Lighter colors reflect more sunlight, keeping the shed cooler, while darker colors absorb more heat. Consider your local climate and personal preferences when making your color selection. Always test the paint on a small, inconspicuous area before applying it to the entire shed to ensure you are satisfied with the color and finish.

Painting Techniques for a Professional Finish

Proper painting techniques are crucial for a professional-looking and durable finish. Using the right tools and applying the paint correctly ensures optimal coverage and minimizes imperfections.

Choosing the Right Tools

Investing in high-quality tools will significantly improve your painting experience and the final result. A good-quality paintbrush, roller, and paint tray are essential. Consider using a brush for detailed areas and a roller for larger surfaces. Choose brushes and rollers with bristles suitable for the type of paint you are using. Masking tape can be helpful for achieving sharp lines along trim and edges.

Applying the Paint: A Step-by-Step Guide

  • Start with the Trim: Begin by painting the trim and any detailed areas using a paintbrush. Pay attention to detail and ensure even coverage.
  • Roll on the Paint: Use a roller to apply the paint to larger surfaces, working in sections and maintaining a wet edge to prevent lap marks. Apply thin, even coats, allowing each coat to dry completely before applying the next.
  • Multiple Thin Coats: It's better to apply several thin coats than one thick coat. This minimizes runs, drips, and ensures better penetration and adhesion. Allow ample drying time between coats, as specified by the paint manufacturer.
  • Clean Up: Clean your brushes and rollers thoroughly immediately after use, following the manufacturer's instructions for your specific type of paint.
  • Dealing with Difficult Areas

    Corners, edges, and other hard-to-reach areas may require special attention. Use a smaller brush or a detail roller to ensure even coverage in these areas. Don't be afraid to take your time and work carefully to achieve a professional-looking finish.

    Post-Painting Care and Maintenance

    Even with meticulous preparation and painting, proper post-painting care is crucial to maintaining the shed's protective coating and extending its lifespan.

    Allowing Adequate Drying Time

    Allow sufficient drying time between coats and after the final coat, as specified by the paint manufacturer. Avoid using the shed or exposing it to rain during this period. High humidity and extreme temperatures can affect drying times.

    Regular Inspection and Maintenance

    Regularly inspect the shed's exterior for any signs of damage, peeling paint, or mildew growth. Address any issues promptly to prevent further deterioration. Consider pressure washing the shed periodically to remove dirt and debris.

    Repainting Schedule

    Exterior paints typically have a lifespan of several years, but this can vary depending on the paint quality, climate, and exposure to the elements. Consider repainting every 3-5 years or as needed to maintain the shed's protective barrier and its aesthetic appeal. Regular maintenance significantly extends the life of your paint job.

    By following these comprehensive guidelines, you can ensure a long-lasting and weatherproof finish for your 8x8 lean-to shed, protecting your investment and enhancing the beauty of your property for years to come.

    Read More..

    8x8 Gable Roof Shed Plans: Classic Design for Any Backyard

    8x8 Gable Roof Shed Plans: Classic Design for Any Backyard

    Dreaming of a charming and practical shed to organize your outdoor space? An 8x8 gable roof shed offers the perfect blend of classic aesthetics and ample storage. This versatile structure complements any backyard, providing a secure haven for tools, gardening supplies, or even a cozy workspace. This article delves into the key aspects of designing and building your own 8x8 gable roof shed, empowering you to create the perfect addition to your property.

    Why Choose an 8x8 Gable Roof Shed?

    The 8x8 footprint offers a surprisingly generous amount of storage space without overwhelming a smaller yard. The gable roof, with its two sloping sides, provides excellent water runoff, protecting your belongings from the elements. This classic design is both visually appealing and structurally sound, ensuring years of reliable service. Furthermore, its relatively compact size makes it manageable for DIY enthusiasts, and the numerous available plans simplify the construction process. The simple design is easier to construct than more complex shed styles, making it a great project for beginners.

    Essential Design Considerations

    Foundation: The Sturdy Base

    Begin by choosing a suitable foundation. A concrete slab offers the most robust and long-lasting base, ensuring stability and preventing ground settling. Alternatively, consider pressure-treated lumber for a simpler, more budget-friendly option. Proper leveling is crucial for a square and stable structure; use a level to ensure accurate placement of your foundation components. Remember, a strong foundation dictates the longevity and structural integrity of your entire shed.

    Framing: The Shed's Skeleton

    The framing forms the backbone of your shed. Use pressure-treated lumber for the base plates, ensuring resistance to rot and insect damage. Precisely cut and assemble the wall studs, ensuring they are plumb and square. Properly bracing the walls adds significant structural strength and stability, especially crucial in areas prone to strong winds. Accurate measurements and precise cuts are essential at this stage to guarantee a perfectly square shed.

    Roofing: Protection from the Elements

    The gable roof offers excellent water shedding capabilities. Construct the rafters carefully, ensuring they are properly spaced and securely fastened to the ridge board. Use appropriate roofing materials, such as asphalt shingles or metal roofing, depending on your budget and aesthetic preferences. Properly sealing the roof prevents leaks, preserving the integrity of your shed and its contents. Pay close attention to the roof's overhang, ensuring adequate protection for the shed's walls from rain and snow.

    Siding and Finishing Touches: Aesthetics and Durability

    Select siding that complements your home's style and provides lasting protection. Vinyl siding offers low-maintenance durability, while wood siding adds a rustic charm. Consider adding a door and windows for easier access and ventilation. A final coat of paint or stain protects the wood and enhances the shed's appearance, allowing you to personalize your structure to match your outdoor décor. Don't forget the finishing touches, such as weather stripping around doors and windows to further improve weather resistance.

    Building Your 8x8 Gable Roof Shed: A Step-by-Step Approach

    While detailed plans are readily available online and in home improvement stores, a general approach involves the following crucial steps:

    1. Site Preparation: Clear the area, level the ground, and mark the foundation outline.
    2. Foundation Construction: Build your chosen foundation (concrete slab or pressure-treated lumber).
    3. Framing: Construct the floor joists, wall frames, and roof trusses.
    4. Sheathing and Roofing: Attach sheathing to the walls and roof, then install the roofing material.
    5. Siding and Trim: Install your chosen siding, add trim, and install the door and windows.
    6. Finishing Touches: Paint or stain the exterior, add hardware, and ensure all weatherproofing is complete.

    Remember to consult local building codes and obtain any necessary permits before beginning construction. By following these steps and referring to detailed plans, you can build a sturdy and attractive 8x8 gable roof shed that enhances your backyard for years to come.

    Read More..

    Complete Shed Construction Guide – Free 8x12 Plans

    Friday, January 31, 2025

    Complete Shed Construction Guide â€" Free 8x12 Plans

    Building your own shed is a rewarding project that can save you significant money and provide a valuable addition to your property. This comprehensive guide walks you through the process of constructing an 8x12 shed, complete with free plans, offering step-by-step instructions and valuable tips to ensure a successful build. Get ready to transform your outdoor space with this practical and detailed guide!

    Planning Your 8x12 Shed

    Before you even pick up a hammer, meticulous planning is crucial. This phase determines the success of your project. Start by carefully considering your needs. What will you store in the shed? Tools? Gardening equipment? Knowing this helps determine the necessary features. Next, secure the necessary permits from your local council. This step might seem tedious, but ignoring it can lead to costly fines. Finally, choose a suitable location on your property; ensure it’s level, accessible, and meets any local regulations regarding setbacks from property lines. We provide free 8x12 shed plans, but you might need to adjust them based on your specific requirements and local building codes.

    Choosing the Right Materials

    The quality of your materials directly impacts the longevity and stability of your shed. Select pressure-treated lumber for the foundation and framing to withstand the elements. Consider using a durable roofing material like asphalt shingles or metal roofing, depending on your budget and aesthetic preferences. Don’t skimp on the hardware; use galvanized screws and strong hinges to ensure your shed remains secure and weather-resistant. A detailed materials list is included in our free 8x12 shed plans to help guide you through this phase. Remember to account for potential waste and order extra materials just in case.

    Foundation and Framing

    Building a strong foundation is non-negotiable. We recommend a concrete slab for optimal stability, especially if you plan on storing heavier items. Alternatively, consider using pressure-treated 4x4 posts set in concrete footings. Our free plans detail both options. Once the foundation is complete, begin framing the walls. Use accurately cut lumber and ensure all corners are square and plumb. Accurate measurements are crucial for a sturdy and functional structure. Take your time and double-check your work at each stage.

    Constructing the Walls and Roof

    After completing the framing, you'll add the sheathing. This provides a solid base for the exterior cladding. Make sure to use appropriate fasteners, ensuring a tight and secure fit. Next, erect the roof trusses or rafters, ensuring they are properly aligned and secured. The roof design, detailed in our free plans, ensures efficient water runoff. Remember to check your local building codes for specific requirements regarding roof pitch and snow load capacity.

    Finishing Touches and Considerations

    Once the structure is complete, it's time to add the finishing touches. This includes installing the siding, roofing material, and doors. Pay close attention to the details during this phase; proper installation significantly improves the shed's weather resistance. Consider adding windows for extra light and ventilation. Don't forget the door hardware â€" secure and functional latches are vital for security. Finally, add a layer of sealant to protect the wood and extend its lifespan.

    Essential Tools and Safety Precautions

    Building a shed requires a range of tools. You’ll need measuring tools like tape measures and levels, cutting tools such as saws (circular saw, hand saw), and fastening tools including drills and screw guns. Safety is paramount. Wear appropriate safety gear, including safety glasses, gloves, and hearing protection, throughout the construction process. Always follow safe practices when using power tools and work with a partner if necessary, especially when lifting heavy materials.

    Download Your Free 8x12 Shed Plans Now!

    Ready to start building your dream shed? Download our free 8x12 shed plans now! These detailed plans provide comprehensive step-by-step instructions, diagrams, and material lists. Click the link below to access your free plans and begin your shed construction journey today! (Insert Link Here)

    Remember, while these plans offer a comprehensive guide, always refer to local building codes and regulations. Happy building!

    Read More..

    Easy Shed Building Plans – Free Materials List Included

    Easy Shed Building Plans â€" Free Materials List Included

    Constructing a shed can be a rewarding DIY project, offering valuable storage space and enhancing property aesthetics. This comprehensive guide provides detailed plans for a simple yet sturdy shed, along with a free materials list, enabling even novice builders to undertake this endeavor with confidence. The focus will be on clarity and precision, guiding you through each stage of the process.

    Planning and Preparation

    Before commencing construction, meticulous planning is crucial for a successful outcome. This involves several key steps:

    Site Selection and Preparation

    Choosing the appropriate location for your shed is paramount. Consider factors such as proximity to utilities, accessibility, sunlight exposure, and drainage. Ensure the chosen site is level and free of obstructions. Leveling the ground may involve excavating and compacting the soil, potentially requiring the use of gravel or other leveling materials. Proper drainage is crucial to prevent water accumulation around the shed's foundation.

    Permitting and Regulations

    Check with your local authorities regarding building permits and zoning regulations before beginning construction. Requirements vary depending on your location and the size of the shed. Failing to obtain necessary permits could lead to fines or even demolition orders. Researching local codes proactively saves time and potential legal issues.

    Design Considerations

    While these plans offer a basic shed design, consider your specific storage needs when making adjustments. Think about the desired dimensions, door placement, window placement (if any), and overall aesthetic appeal. Larger sheds naturally require more materials and more complex construction but offer greater storage capacity. Smaller sheds are simpler to build but might limit storage options.

    Materials List

    The following list provides the necessary materials for constructing a 8ft x 6ft shed. Quantities may need adjusting based on specific design modifications.

    • Pressure-treated lumber:
      • 4x4 posts: 4
      • 2x4 studs: 20
      • 2x6 floor joists: 6
      • 2x4 rafters: 8
      • 2x4 for bracing: 10
      • 2x4 for door frame: 4
    • Plywood sheeting: 1 sheet (8ft x 4ft) for floor and 2 sheets (8ft x 4ft) for walls
    • Roofing felt: 1 roll
    • Shingles or other roofing material: Sufficient quantity for the roof area
    • Exterior siding: Sufficient quantity to cover the walls (e.g., vinyl, wood, metal)
    • Concrete blocks or pier blocks: 4
    • Screws: Various sizes for wood and metal connections
    • Nails: Various sizes for framing and siding
    • Door: Pre-hung exterior door (6ft tall)
    • Hinges: 3
    • Door handle and latch: 1 set
    • Gravel or other base material: As needed for leveling
    • Post-hole diggers (or equivalent): For setting the posts
    • Level: For ensuring level construction
    • Measuring tape: For accurate measurements
    • Safety glasses and work gloves: For personal protection

    Construction Steps

    The following steps outline the construction process. Refer to detailed diagrams and illustrations for visual assistance (not included in this text-based guide). Safety should always be your top priority.

    Foundation

    Begin by digging holes for the four corner posts. Use a post-hole digger or other appropriate tool. Ensure the holes are deep enough to provide stability and prevent frost heave. Set the pressure-treated 4x4 posts into the holes, ensuring they are plumb (perfectly vertical) using a level. Secure the posts with concrete or pier blocks.

    Framing the Floor

    Once the posts are set, install the 2x6 floor joists. These should be laid across the posts, creating a framework for the plywood flooring. Ensure the joists are level and securely fastened to the posts. Then, lay the plywood sheeting onto the joists, securing it with screws.

    Wall Framing

    Construct the wall frames using 2x4 studs. Measure and cut the studs to the appropriate height, creating a rectangular frame for each wall. Connect the studs using appropriate screws or nails, ensuring the corners are square. Remember to incorporate bracing for added structural strength.

    Roof Framing

    Next, construct the roof frame using 2x4 rafters. The rafters should be properly spaced and angled to create the desired roof pitch. Ensure the rafters are securely connected to the top plates of the wall frames. Use additional bracing to ensure roof stability.

    Roofing and Siding

    Apply roofing felt to the roof frame before installing shingles or your chosen roofing material. This acts as a water barrier. Then, install the exterior siding, covering the framed walls. Choose siding material that matches your aesthetic preferences and budget.

    Door Installation

    Install the pre-hung door in the designated opening. Use appropriate hinges and secure them firmly to both the door and the door frame. Install the door handle and latch for secure closure.

    Finishing Touches

    Once the main structure is complete, add finishing touches such as painting or staining the exterior and interior of the shed. Consider additional features like shelving or workbenches inside, depending on your needs. Regular maintenance will help prolong the shed's lifespan.

    Disclaimer: This guide provides general instructions. Consult professional resources and building codes for detailed specifications appropriate to your location. Always prioritize safety during the construction process. The provided materials list is a guideline; actual needs may vary.

    Read More..

    10x16 Shed Blueprints – Free and Customizable Plans

    10x16 Shed Blueprints â€" Free and Customizable Plans

    Hey there, fellow shed enthusiasts! So you're dreaming of a 10x16 shed â€" a spacious haven for all your gardening tools, workshop equipment, or maybe even a cozy little artist's studio. That's fantastic! But before you dive headfirst into building, you'll want a solid plan. And guess what? You've come to the right place. This article is all about finding and using free, customizable 10x16 shed blueprints to bring your dream shed to life. Let's get started!

    Why Choose a 10x16 Shed?

    A 10x16 shed offers a fantastic balance of space and practicality. It's big enough to be truly useful, yet not so overwhelmingly large that the construction becomes a monumental task. This size is perfect for a variety of uses:

    • Workshop: Plenty of room for your tools, workbench, and projects.
    • Gardening Storage: Easily accommodates all your gardening equipment, fertilizers, and potting supplies.
    • Storage Shed: Ideal for storing seasonal items, outdoor furniture, sports equipment, or anything else cluttering your garage or house.
    • Home Office/Studio: With proper insulation and finishing, it can even become a cozy and productive workspace.

    The versatility of a 10x16 shed is a major selling point. It can be adapted to fit your specific needs, and that's what makes finding the right blueprint crucial.

    Finding Free 10x16 Shed Blueprints

    Now, let's talk about the fun part â€" finding those blueprints! While you might be tempted to jump straight to paid plans, plenty of excellent free resources are available. Here are a few places to explore:

    Online Shed Plan Websites

    Many websites specialize in providing free shed plans. These often come with detailed diagrams, material lists, and even step-by-step instructions. However, be sure to carefully review the plans before starting your project. Some free plans might be less detailed than paid ones, and you may need to do some additional research or adjustments.

    DIY Forums and Communities

    Online forums and communities dedicated to DIY projects are treasure troves of information. Members often share their own shed plans, modifications, and tips. This is a great place to find inspiration and even get personalized advice from experienced builders. Just remember to be respectful and contribute to the community as well!

    YouTube Tutorials

    Visual learners rejoice! YouTube is packed with tutorials on building sheds of all sizes, including 10x16 sheds. These videos often provide a great overview of the construction process and can help clarify aspects of the blueprints that may be unclear. Be sure to check the comments section as well, as viewers often share helpful tips and modifications.

    Customizing Your 10x16 Shed Blueprints

    The beauty of free blueprints is that you can usually customize them to fit your specific requirements. This is where your creativity really shines! Think about:

    Door and Window Placement

    Do you need a large double door for easy access with larger equipment? Or would a single door suffice? Where would you ideally place windows for natural light and ventilation? These decisions are crucial for functionality and aesthetics.

    Roof Style

    Consider the climate where you'll be building the shed. A gable roof is a classic choice, offering good water runoff. A shed roof is simpler to construct, while a gambrel roof provides extra headroom inside. The best choice depends on your priorities and local weather conditions.

    Material Choices

    The blueprint might specify certain materials, but you have some flexibility. Choosing treated lumber for the framing will improve durability, especially if you're in a humid climate. Consider using metal roofing for added protection against the elements.

    Adding Features

    Do you need extra shelving, a workbench, or a loft? You can easily incorporate these features into your design. Remember to adjust the structural calculations to account for the added weight and load.

    Building Your 10x16 Shed: A Step-by-Step Overview

    Building a shed is a rewarding experience, but it requires careful planning and execution. Here's a general overview:

    Site Preparation

    Start by choosing a level location and clearing the area. Mark the foundation outline and prepare the ground for your chosen foundation type (concrete, gravel, etc.).

    Foundation Construction

    Build a sturdy foundation to support the weight of your shed. This ensures stability and longevity.

    Framing

    Following your blueprints, carefully construct the frame using pressure-treated lumber. Ensure all cuts are precise and the frame is square and plumb.

    Sheathing

    Install sheathing to create a solid surface for the siding. This also provides structural support.

    Roofing

    Install the roofing according to your chosen material and the blueprint instructions. Make sure it's properly waterproofed.

    Siding and Trim

    Install the siding and add finishing trim to complete the exterior. This adds both aesthetic appeal and weather protection.

    Interior Finishing (Optional)

    If you're planning on using the shed as a workspace or studio, consider adding insulation, drywall, and flooring.

    Commonly Asked Questions

    Here are some frequently asked questions about building a 10x16 shed:

    • Q: Do I need a building permit? A: Building permit requirements vary by location. Check with your local authorities before starting the project.
    • Q: What tools will I need? A: You'll need basic carpentry tools like a saw, hammer, level, measuring tape, and drill. More specialized tools might be needed depending on your chosen materials and construction methods.
    • Q: How long will it take to build? A: The construction time depends on your experience and the complexity of your chosen plan. It can range from a few weekends to several weeks.
    • Q: How much will it cost? A: The cost depends on the materials you choose and any customizations. Expect to spend anywhere from a few hundred to a couple of thousand dollars.
    • Q: Can I modify the plans significantly? A: Yes, but you should have a good understanding of structural engineering and building codes. If you're unsure, consult with a qualified professional.

    Building a 10x16 shed can be a rewarding project. Remember to take your time, follow the plans carefully, and don't hesitate to ask for help when needed. Happy building!

    Read More..

    DIY Shed Building for Backyard Storage – Free PDF

    DIY Shed Building: Your Guide to Backyard Storage Bliss (Free PDF Included!)

    Dreaming of a tidy backyard and a place to stash all those garden tools, outdoor furniture, and seasonal decorations? Building your own shed is a rewarding project that combines practical skills with immense satisfaction. This guide provides a comprehensive walkthrough, empowering you to construct a sturdy, attractive shed tailored to your needs. Plus, download our free PDF plan to get started today!

    Planning Your Perfect Shed

    Before you even think about touching a hammer, careful planning is essential. This phase determines the success of your project. First, consider the size and dimensions of your shed. How much storage space do you realistically need? Measure your backyard carefully to determine the optimal location, ensuring you comply with any local building codes and zoning regulations. Consider factors such as sun exposure, access to utilities, and proximity to your home.

    Choosing the Right Materials

    The materials you choose significantly impact both the shed's durability and its aesthetic appeal. Pressure-treated lumber offers excellent resistance to rot and insect damage, making it an ideal choice for the frame. For the exterior cladding, explore options like wood siding, metal sheeting, or vinyl panels, balancing cost, maintenance requirements, and your desired look. Don't forget about the roofâ€"consider asphalt shingles for a classic look or metal roofing for longevity and weather resistance.

    Essential Tools for Success

    Gathering the right tools beforehand saves you time and frustration. Your arsenal should include a measuring tape, level, saw (circular saw and hand saw are recommended), drill, hammer, screwdriver, shovel, and safety glasses. Invest in quality tools; they'll make the job easier and safer. A post hole digger will also greatly simplify the foundation process if you're opting for a post-supported base.

    Building Your Shed: A Step-by-Step Guide

    With your plan and materials ready, it’s time to build! This section provides a simplified overview. Refer to our free PDF for detailed, illustrated instructions.

    Foundation & Framing

    Begin by preparing a level foundation. This could involve a concrete slab, a gravel base, or a system of pressure-treated posts set in concrete. Once the foundation is secure, erect the frame according to your plans. Precise measurements and careful assembly are crucial for a stable structure. Use appropriate fastenersâ€"construction screws are generally preferred over nails for their superior holding power.

    Sheathing & Roofing

    Once the frame is complete, attach the sheathing (usually plywood) to the walls, ensuring proper alignment and secure fastening. This provides a solid surface for the exterior cladding. Next, install the roofing material, following manufacturer instructions for proper overlap and sealing. Pay close attention to ensuring the roof is properly sloped to allow for efficient water runoff.

    Finishing Touches

    After installing the cladding, add the finishing touches. This might include installing a door, windows, and any desired hardware. Consider adding a simple paint or stain to protect the wood and enhance the shed's appearance. A final cleanup leaves you with a pristine, functional backyard storage solution. Congratulations on your accomplishment!

    Download Your Free PDF Plan Now!

    Ready to transform your backyard? Click here to download our comprehensive, step-by-step PDF plan, complete with detailed diagrams, material lists, and tips for success. Start building your dream shed today!

    Remember safety first! Always wear appropriate safety gear, including gloves, safety glasses, and hearing protection. If you're unsure about any aspect of the project, don't hesitate to consult a qualified professional.

    Read More..